Most emails are being sent in HTML format, making it relatively easy to adjust fonts and colors as opposed to pure text format. When you want to use a certain font repeatedly or as part of a uniform company communications strategy, you can set your preferred outlook default font for emails.
In the following article, you’ll learn how you can set the default font in Outlook across various versions of the Microsoft email client.
Change the font in Outlook: step-by-step instructions
The exact steps to changing the default font in Outlook depend on the version you’re using. The following instructions provide step-by-step instructions to set the default font in different versions of Outlook.
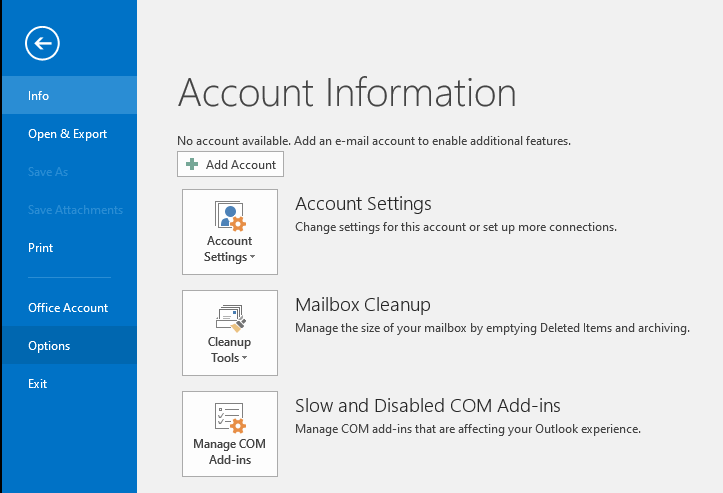
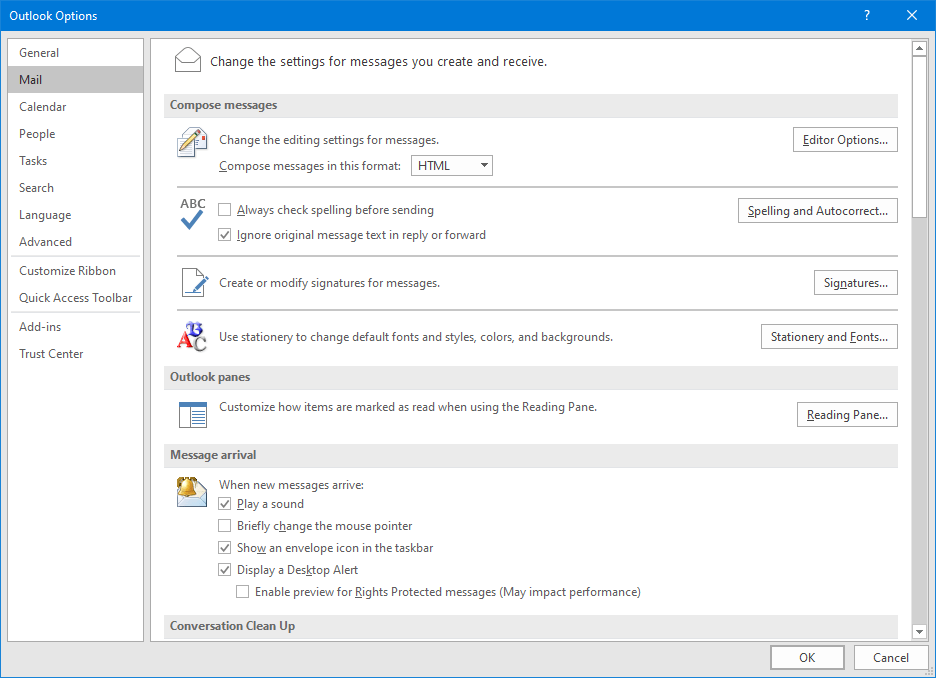
Changing the default font in Outlook (2019, 2016, 2013, 2010, and Outlook in Microsoft 365)
Step 3: The “Signatures and Stationery” window will now pop up where you can select from three font types for writing emails:
- New mail messages: Compose a message in HTML format. The font applies as long as you do not use any special formatting. Where necessary, you can still format individual words or entire paragraphs.
- Replying or forwarding messages: Corresponds to the formatting of the original text of the original email for “Reply and Forward”. Outlook uses a dark blue to contrast the black font of the original text. Many users tend to use a slightly smaller font.
- Composing and reading plain text messages: Display unformatted, plain text emails. The font only appears on your screen; the emails themselves remain unformatted. In the case of plain text emails, no font information is transmitted to the recipient. Individual text areas cannot be formatted differently.
In addition to the font, you can also select the font size, font style (italic, bold, etc.). and color for all three profiles. An appropriately formatted sample text is displayed to help you choose.
Outlook Default Font (2007 and 2003)
In older Outlook versions with the classic interface and pull-down menus, follow these steps to change the default font in Outlook:
Step 1: Select “Extras” in “Options“.
Step 2: In the email format tab, select whether you want to send emails as HTML, plain, or rich text (RTF) via the message formatting tab. Very few clients still support the latter.
Step 3: Click on “Fonts” to launch another window from where you’ll be able to select three different fonts as with newer editions of Outlook:
- Compose HTML or rich text messages
- Reply and forward emails
- Write and read plain-text emails
How to Change Tthe Default Font in Outlook.com
Similarly, you can modify fonts with Outlook.com, the web version of Outlook that can be accessed directly from your browser.
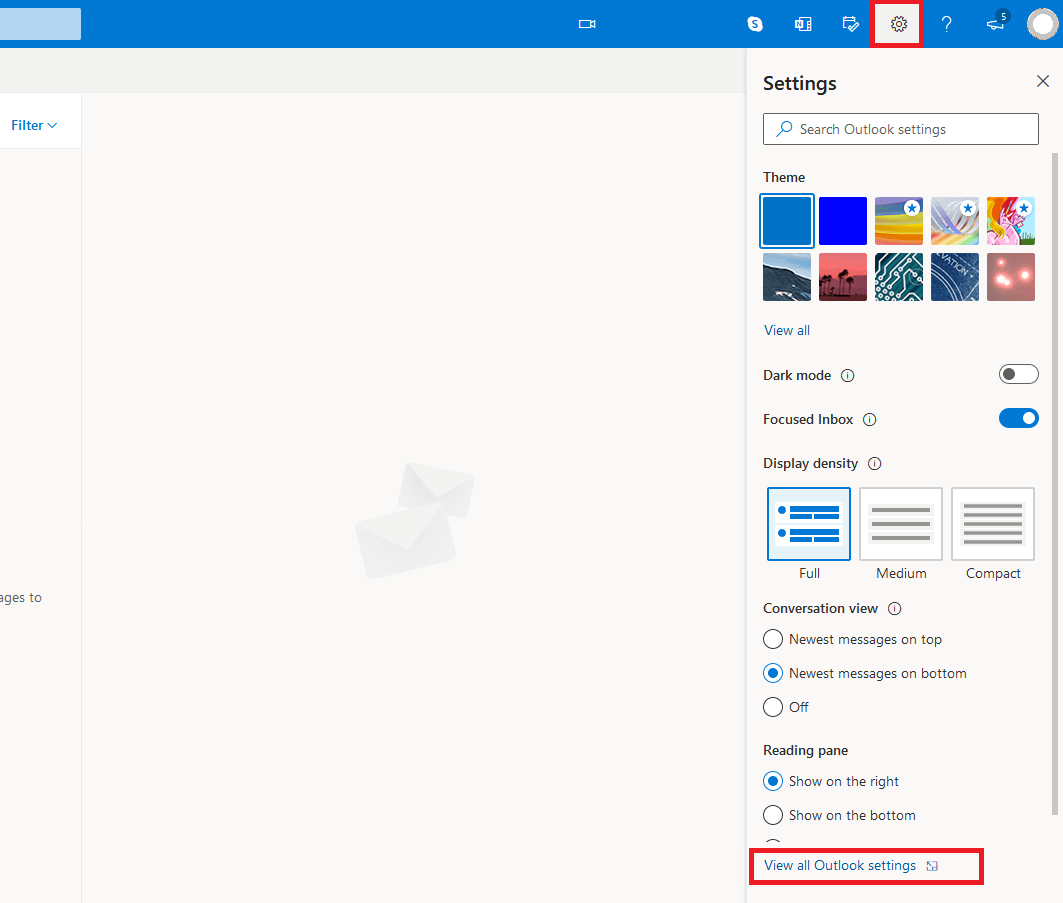
Step 1: Click on the gear icon in the top menu bar and in the quick menu that appears, click on “View all Outlook settings”.
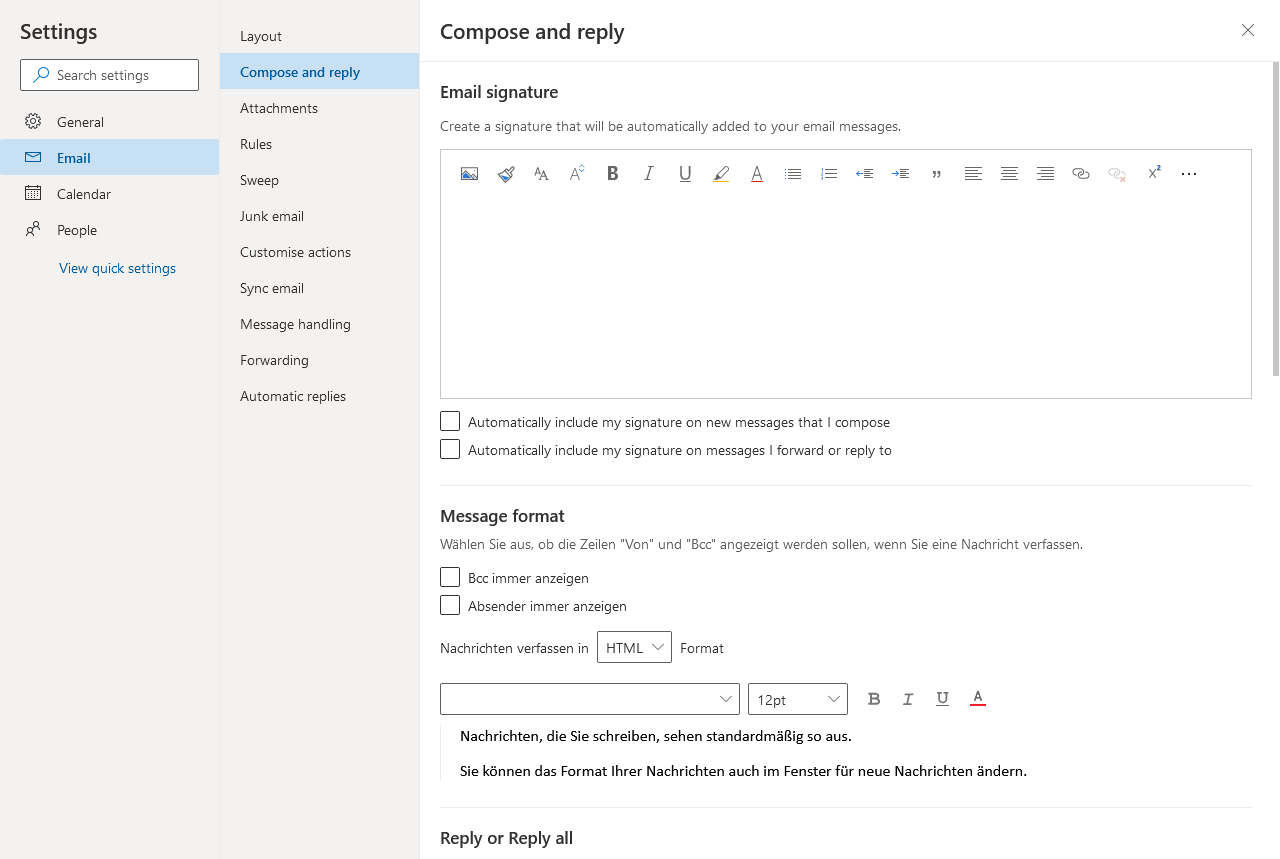
Step 2: Select “Mail” and then the option “Compose and Reply”.
Step 3: Define whether you want to write emails in HTML format or as plain text by default in the “Message format” section.
In the line below, select the font, size, layout, and color of the email text. Different fonts for self-composed, forwarded, or answered emails are not available here.
Step 4: Confirm your selection by clicking on “Save” and closing the window.
Don’t Overdo The Formatting
Large fonts and conspicuous colors are typical email beginner mistakes. Most recipients will associate emails formatted this way with spam and dismiss them as dubious. Avoid decorative fonts, as they’re difficult to read on smartphones.
The same applies to the use of smileys in Outlook: use them to express feelings and irony in private emails but avoid them in business communications.
Outlook auto-creates hyperlinks and formats them in blue. You can also hyperlink words or sentences manually in an email. Simply highlight the word, right-click and select “Link” in the menu and enter the URL address.
To remove a hyperlink, right-click and choose “Remove link”. The same applies to auto-generated hyperlinks.


![Outlook menu “Signatures and Stationery”] Outlook menu “Signatures and Stationery”]](https://www.ionos.com/digitalguide/fileadmin/DigitalGuide/Screenshots_2022/outlook-menu-signatures-and-stationery.png)

