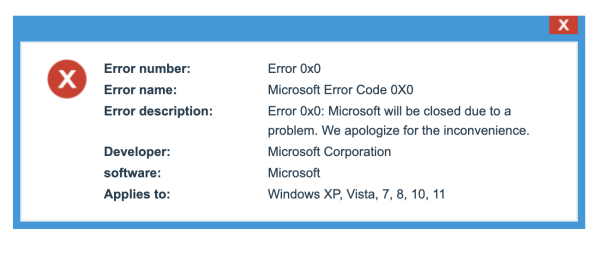
Microsoft Office Error Code
While using Microsoft Office Programs (Word, PowerPoint, Excel, etc.) you may occasionally appear with the error message 0x426-0x0. Error messages usually tell you that something is wrong with the file installation process and the processes involved with Microsoft’s suite of applications. As a result, when this 0x426-0x0 error occurs, the MS Office suite will not open. The full error message reads as follows,
Something went wrong We couldn’t start your program. Try starting again. If it doesn’t start, try repairing Office from ‘Programs and Features’ in Control Panel. Error Code: 0x426-0x0
A disabled click-to-run service or a Corrupt installation of Microsoft Office can cause this error. Sometimes the interruption of a third-party utility or an old office that is already installed can cause a conflict. If you are also facing this issue and getting an error when opening Office apps, don’t worry as this can be solved easily. This article takes you through some tested fixes that help get rid of error 0x426-0x0.
list of contents
Fix 1: Repair the Microsoft Office suite
Step 1: Press Win+R to open the Run window.
Step 2: Type appwiz.cpl, and press Enter.
Step 3: The Programs and Features window opens, scroll down to select Microsoft 365 (Other Office Suites) and click Change.
Step 4: A Microsoft Pop-up window will open, click Quick Repair > Repair.
Step 5: You will get a pop-up message asking for Repair Confirmation, Click Yes.
Step 6: Follow the instructions that appear on the screen and repair MS Office.
Step 7: Restart MS Office and see if the error is resolved. Otherwise, select Online Repair (instead of Quick Fix as in Step 4) to repair Office applications.
Step 8: Reboot your system and open any MS Office application to see if the error is resolved. If not move on to the next fix.

Fix 2: Set Microsoft’s click-to-run service to automatic
Step 1: Press Win+R to open the run window.
Step 2: Type services.msc , and press Enter.
Step 3: Scroll down to select Microsoft Office and click to run.
Step 4: Right-click to select Properties.
Step 5: On the General tab, under Startup type, select Automatic and click Apply.
Step 6: Open a Microsoft Office Program to check if the error is resolved.
Fix 3: Turn off Windows Defender Firewall
Step 1: Open the Run window by pressing Win+R at the same time.
Step 2: Type control firewall.cpl, and press Enter.
Step 3: In the left menu, click the Turn Windows Defender Firewall button to enable or disable the option.
Step 4: Select the radio button near Turn off Windows Defender Firewall and click OK as shown
Step 5: Restart the system and open any MS Office application to check if the error is resolved. If not move to the next step.
Fix 4: Temporarily disable third-party antivirus
If you are using a third-party antivirus, use this fix and see if the error is resolved. Here I use Norton Security. To do so,
Step 1: Click Show hidden icons that are on the bottom right side of the screen.
Step 2: Right-click on the antivirus icon to select Disable Automatic Protection.
Step 3: In the window that appears, select the time for which you want to disable the auto-protection, Click OK.
Step 4: Now, you can launch any MS Office application and see if the error is resolved.
Fix 5: Ending all Office-related processes
If they are MS Office applications or processes that run silently in the background while using your system, they can stop you from opening new office applications. So you have to end all office-related processes to fix error 0x426-0x0. To do so,
Step 1: Open the Run window by holding the Win+R key.
Step 2: Type taskmgr.exe and press Enter.
Step 3: In the Processes tab, scroll down to select Microsoft Click-to-run(SxS).
Step 4: Right-click on it and click End Task.
Step 5: Now, open the MS Office application and see if the error is resolved.
Fix 6: Reinstall Microsoft Office
Step 1: Type Apps & Features in the search box and press Enter.
Step 2: Scroll down to select Microsoft 365 or other MS Office (2021,2019, etc.).
Step 3: Click the 3 dots and click Uninstall.
Now, even after uninstalling Office Suite, there might be some shortcuts, folders, directories left and you have to delete them manually. To do this, follow these steps:
Step 4: In the Start search tab, type %Programfiles% (64-bit processor) and press Enter.
NOTE – If you are using a 32-bit processor, type %Programfiles(x86)%.
Step 5: Select all remaining office folders and delete them.
Step 6: Next, open the registry editor by typing Regedit in the Run window.
Step 7: UAC will ask for permission, click Yes.
Step 8: Type the address of the given sub-folder.
HKEY_CURRENT_USER\Software\Microsoft\Office
Step 9: Now, right-click on each one and click Delete. In the same way, delete all the folders in the Office Registry.
Step 10: Finally, Download Microsoft 365 or any other Office suite and reinstall it.
>Additional Tip – There is also an Office Uninstall Support Tool that you can use to uninstall the MS Office suite. If you want to use it, you can download it from here.
Just that.
I hope this article was informative.
Please leave a comment and let us know which fix helped you resolve the issue.
Thank you.
